
Menu


Get Sales Advice from Mon - Fri 9am - 5:00pm:
020 3337 8950LAST UPDATED: May 08, 2026
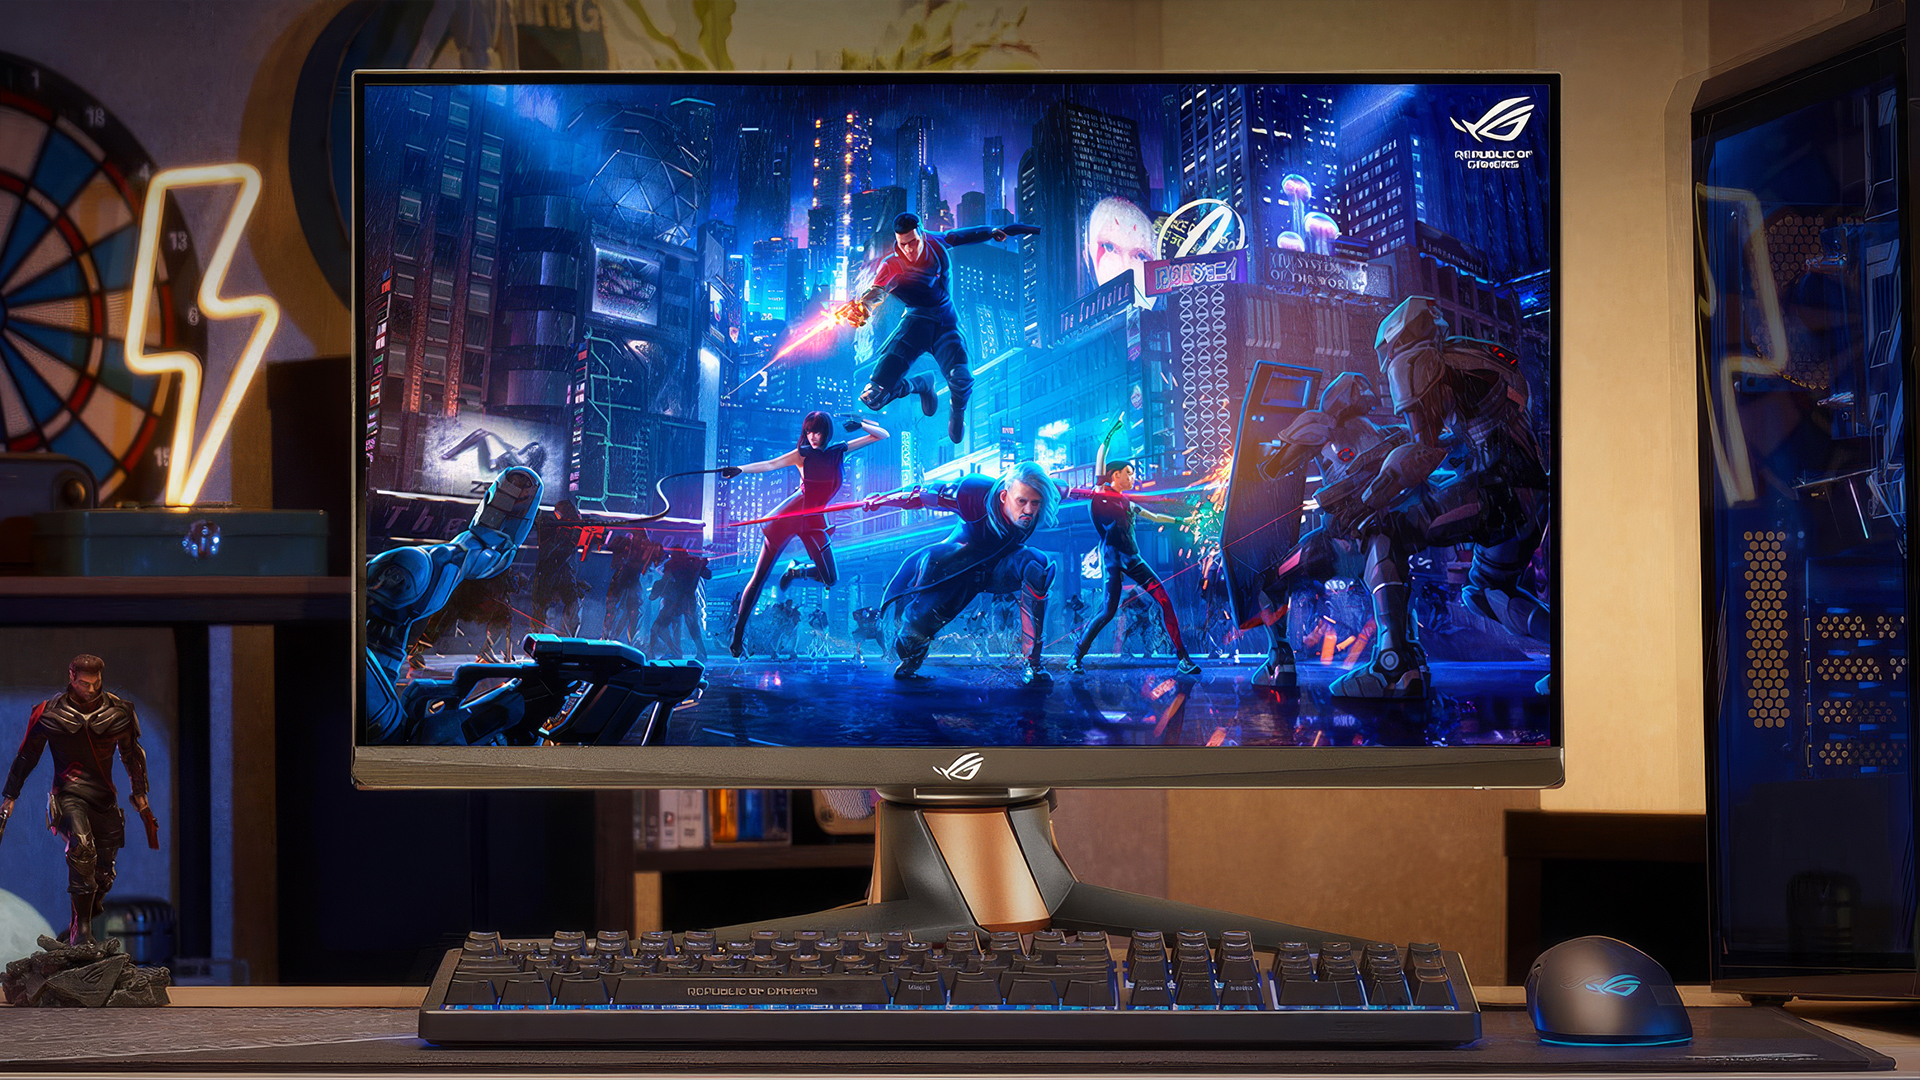
ASUS ROG Monitor Settings Guide: How to Get the Best Picture for Gaming
ASUS ROG monitors are popular with gamers because they combine sharp visuals, fast refresh rates, and useful gaming-focused features. But even a strong display can need a few tweaks before it looks and feels right for your setup.
If you are searching for the ASUS ROG monitor best settings, the aim is not to copy one fixed preset. It is to adjust the monitor around your room lighting, game type, refresh rate, and personal preference.
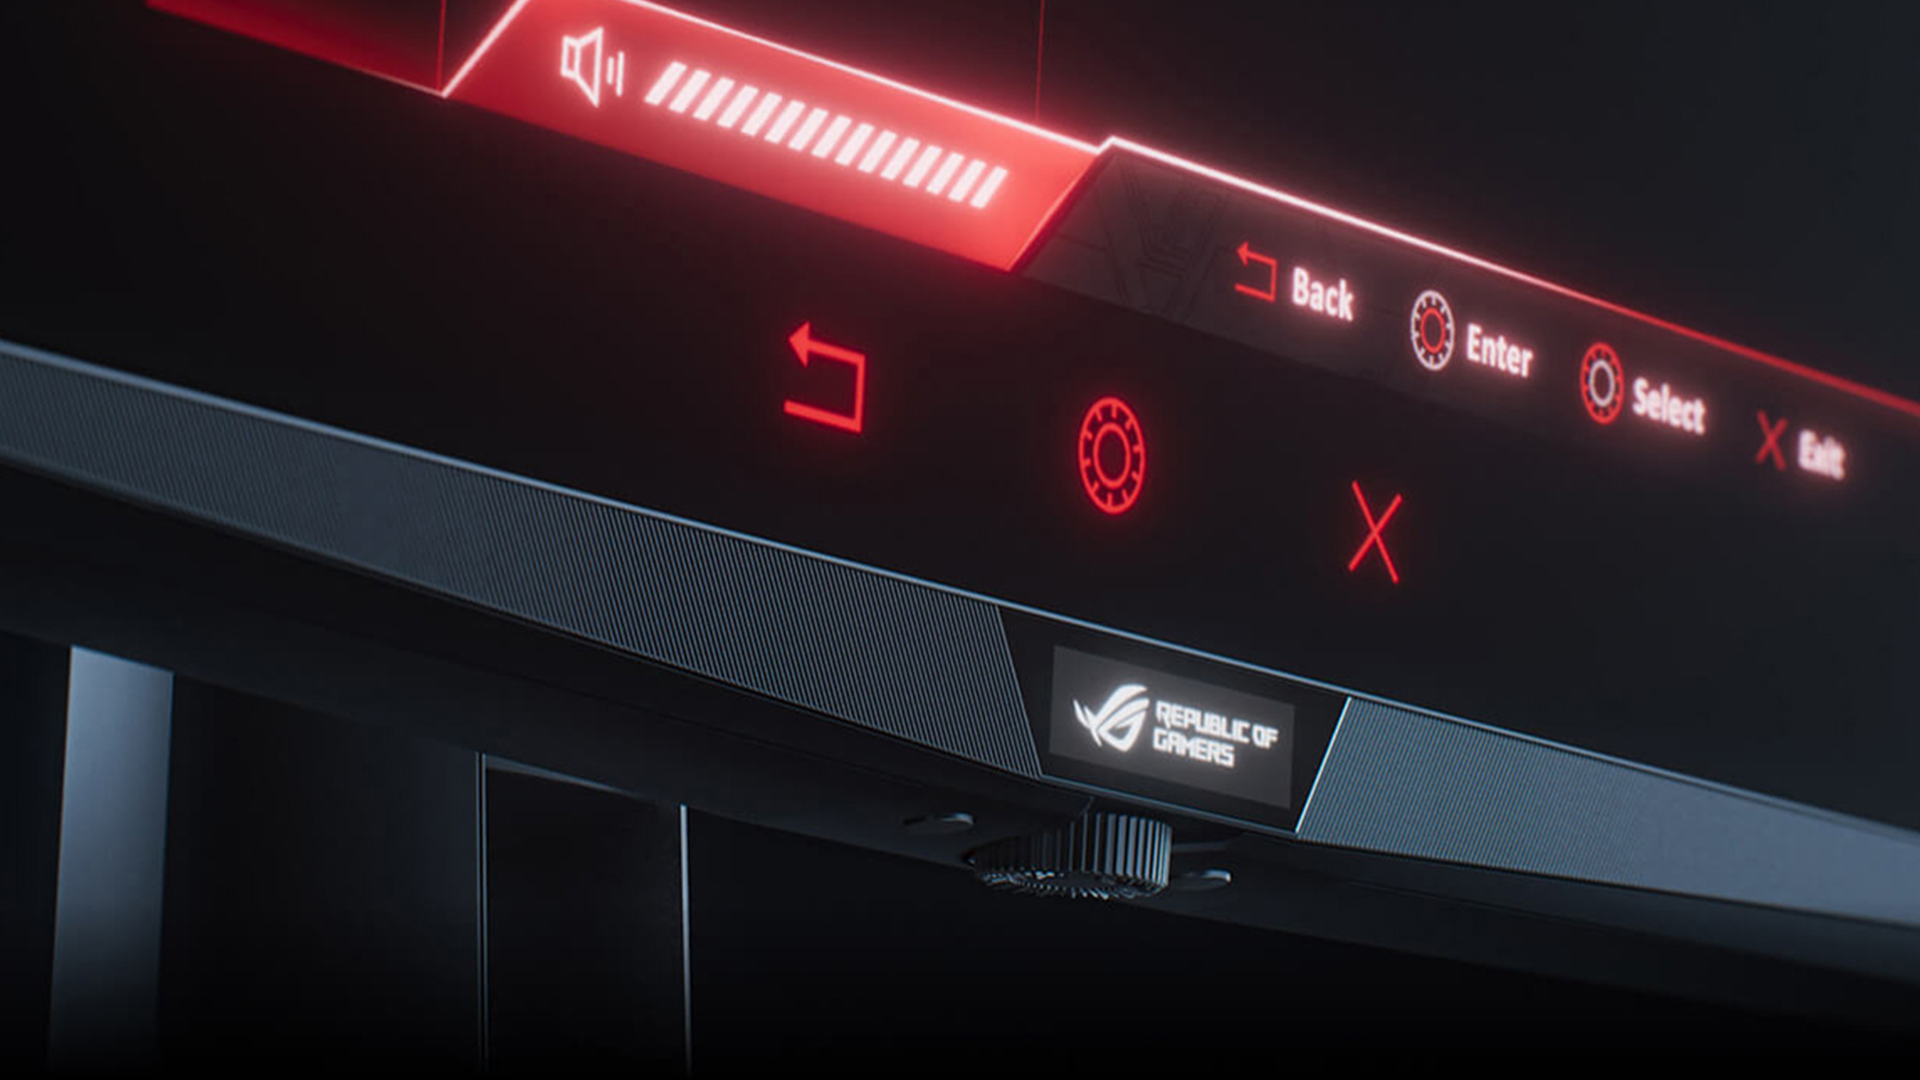
This guide covers the most useful ASUS ROG monitor settings, including brightness, contrast, refresh rate, HDR, sync features, response time, and colour profiles. It also explains how to use the OSD (on-screen display) menu properly, so your gaming monitor feels sharper, smoother, and better suited to the games you play.
Start with the Basics Before Changing Picture Settings
Before changing colours or presets, get the basic ROG monitor setup right. If the resolution, refresh rate, or cable choice is wrong, even the best picture tweaks will not fully fix the experience.
Use the Monitor’s Native Resolution
Start with the monitor’s native resolution settings, such as 1080p, 1440p, 4K, or ultrawide, depending on your model. Native resolution gives the sharpest image because the screen is showing the picture at the panel’s actual pixel layout.
If the image looks soft, stretched, or slightly blurry, check display scaling in Windows and your GPU software. Scaling can be useful for text size, but for gaming, the cleanest option is usually to run the monitor at its native resolution and adjust in-game resolution separately if needed.
Set the Correct Refresh Rate
A common mistake is buying a fast ROG monitor and leaving it at 60Hz. Windows lets you change this through Advanced Display settings, where the available refresh rates depend on what your monitor and connection support. Users can choose from the refresh rates supported by their display, including higher rates on compatible monitors.
For gaming, make sure the monitor is running at its advertised refresh rate (144Hz, 240Hz, 360Hz) or another supported option. This one change can make the desktop, mouse movement, and games feel noticeably smoother before you touch any other ASUS screen settings.
Choose the Right Cable and Input
Your cable matters more than many people realise. DisplayPort is often the safest choice for high refresh rate PC gaming, while HDMI can be ideal for consoles and newer displays if the monitor and cable support the right HDMI version.
Output can also be limited by HDMI bandwidth. For example, HDMI 2.0 can restrict 4K 60Hz 10-bit output on some setups, and ASUS recommends using the included cable or a certified cable that meets the required specification.
This is especially important if you are pairing a high-end ROG screen with graphics cards for gaming monitors. A strong GPU will not help much if the connection is limiting the refresh rate, colour depth, or resolution. Once resolution, refresh rate, and input are set correctly, the rest of your ASUS display settings will have a much better foundation.
Best ASUS ROG Monitor Picture Settings to Adjust First
To get the best settings on an ASUS ROG monitor, you need to start with the basics first. These simple tweaks include: adjust brightness for your room, keep contrast natural, avoid excessive sharpness, and choose a colour tone that looks comfortable rather than overdone.
There is no single perfect preset for every ROG display. Full calibration needs proper equipment, and even two units of the same monitor model can need different values. For most gamers, the better approach is to understand what each setting does and then fine-tune it to personal preference.
Brightness and Contrast
Start with brightness and contrast settings before changing anything more advanced. Brightness controls the backlight intensity, so it should match your room lighting. A bright room may need a higher setting, while a darker room usually feels better with brightness reduced. Brightness does not usually change colour accuracy in the same way as deeper calibration settings.
Contrast should be handled more carefully. Too much contrast can clip bright details, while too little can make the picture look flat. For most users, leaving contrast close to default and making small changes is safer than pushing it too high. This keeps whites clear without losing detail in bright skies, explosions, menus, or HUD elements.
For everyday gaming, a good practical approach is:
- Lower brightness for evening gaming or dim rooms
- Increase brightness slightly for daylight use
- Keep contrast natural, not overly punchy
- Check dark and bright scenes in games you play
Sharpness and Image Clarity
Sharpness can make a screen look clearer at first glance, but too much can create harsh outlines around text, characters, and objects. It is also recommended to treat sharpness carefully because setting it too high can introduce artefacts, while setting it too low can make the image look blurry.
For the best ASUS ROG picture settings, avoid maxing sharpness just because the image looks more defined on the desktop. In games, over-sharpening can make foliage, weapon edges, subtitles, and UI elements look rough. A moderate setting usually gives the best balance between clarity and a natural image.
Colour Temperature and Basic Colour Balance
Colour temperature changes the overall tone of the screen. A cooler setting can make whites look slightly blue, while a warmer setting can make the image feel softer or more yellow.
For most gaming setups:
- Start with the default, normal, or user mode.
- Switch to a warmer tone if the image feels too cold or blue.
- Use a cooler tone only if the picture looks too warm or yellow.
- Avoid changing red, green, and blue values too much unless you know what looks wrong.
This keeps ASUS monitor calibration practical. For casual colour calibration, small changes usually work better than dramatic adjustments.
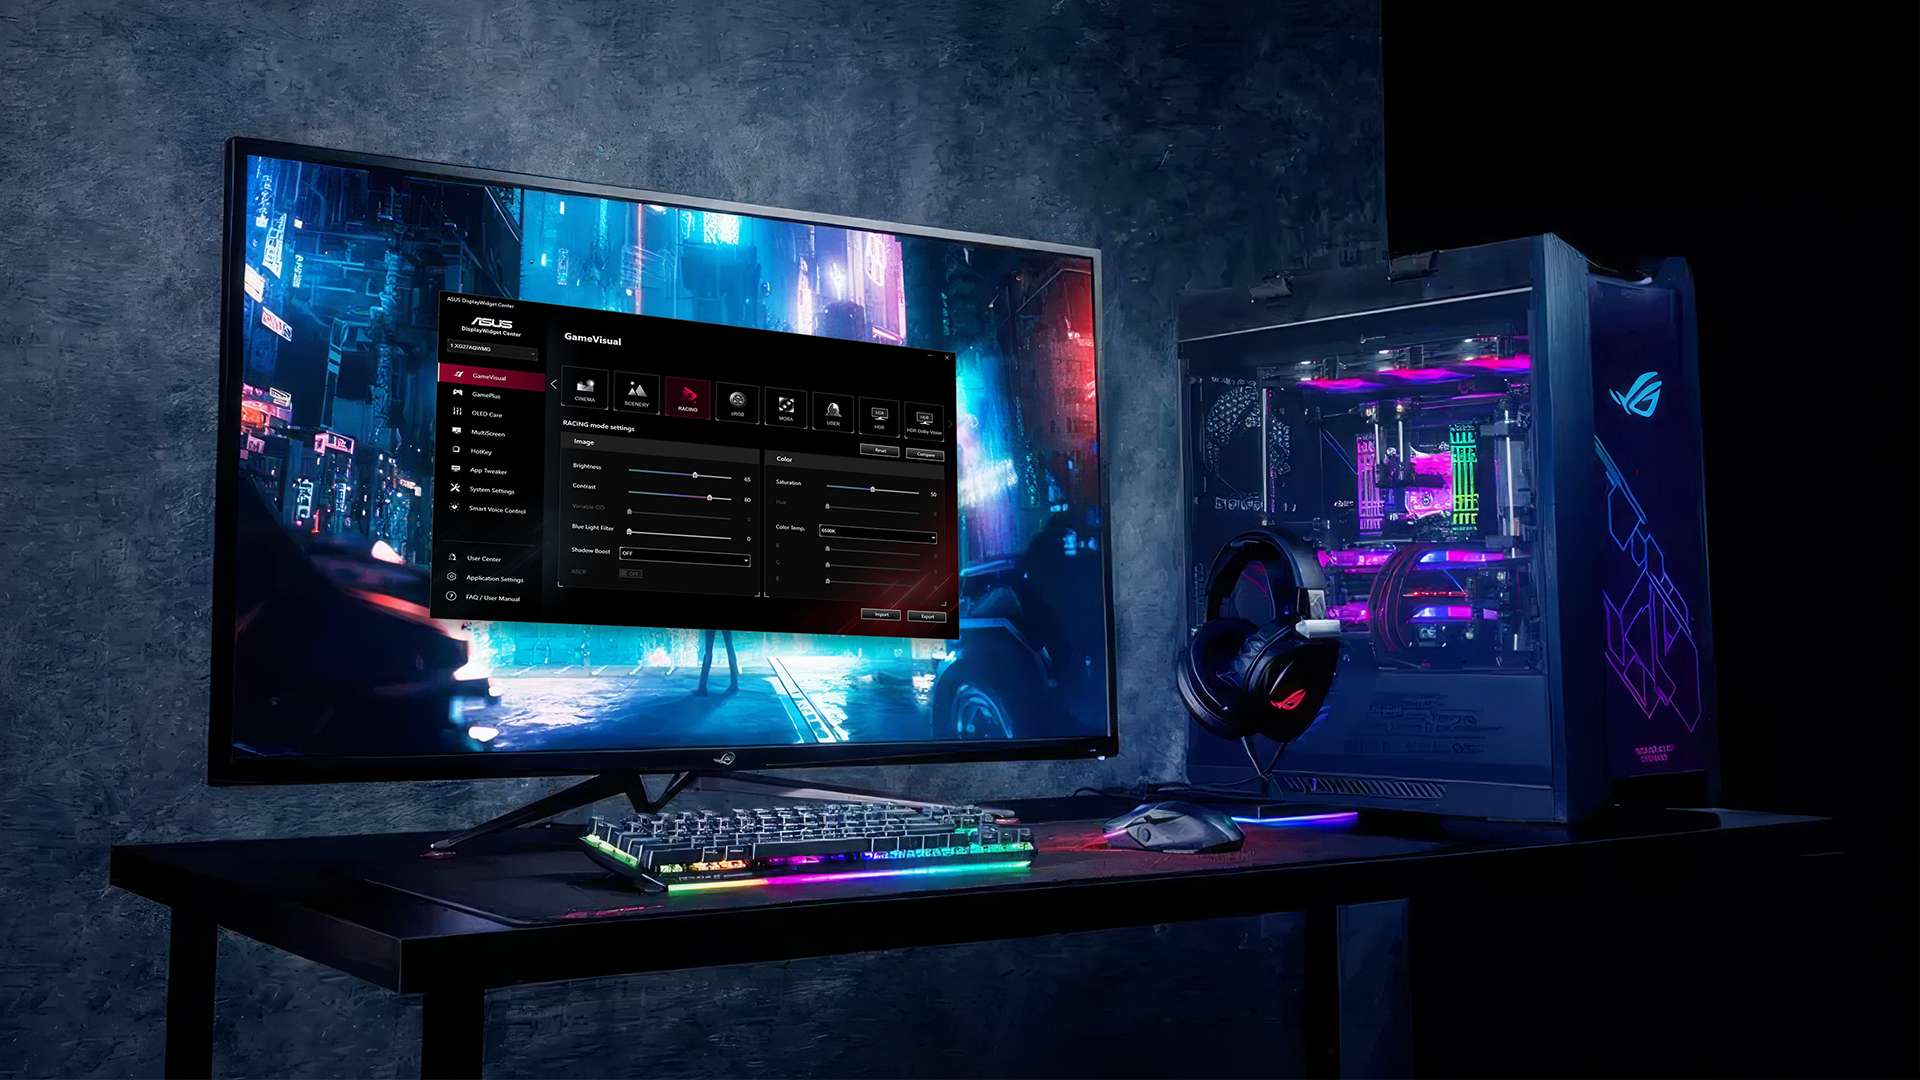
Some supported ROG models also let you adjust brightness, contrast, and colour temperature through DisplayWidget Center, which can make quick changes easier from Windows rather than using only the monitor buttons. The compatibility depends on the model, so it is worth checking before installing.
A good starting point for ASUS display settings is simple:
- Choose natural-looking colour profiles.
- Keep saturation controlled.
- Test the picture in two or three games.
- Stick with the setting that feels clear, comfortable, and consistent.
Tune Colour, Gamma, and HDR for Better Game Visuals
Once the basic picture settings are sorted, the next step is fine-tuning colour depth, shadow visibility, and HDR. These ROG display settings can make games look richer, but they should be adjusted carefully. Too much colour, contrast, or HDR processing can make the image look less natural.
Gamma Settings for Visibility and Depth
Gamma settings affect how bright or dark mid-tones look. In games, this can change how clearly you see shadow detail, indoor areas, caves, night scenes, and darker corners.
For a practical setup:
- Use a balanced gamma level for most games.
- Raise visibility slightly if dark scenes hide too much detail.
- Avoid making shadows too bright, as this can flatten the image.
- Test gamma in an actual game, not just on the desktop.
For competitive games, clearer shadow detail can help. For story-driven games, a deeper image may look more immersive. This is where gaming display settings should match the game type, not just one universal preset.
HDR Settings: When to Use Them
HDR settings can improve contrast and colour detail when the monitor, game, cable, and system settings all support HDR properly. HDR is most useful in games with strong lighting effects, bright highlights, and darker cinematic scenes.
Use HDR when:
- The game has proper HDR support.
- Your monitor has good HDR capability.
- Windows HDR is enabled and calibrated correctly.
- The image looks more detailed, not washed out.
Leave HDR off when:
- Colours look faded.
- Blacks look grey.
- The desktop becomes too bright.
- The game’s HDR implementation looks worse than SDR.
On Windows 11, the HDR Calibration app can help improve colour accuracy and consistency for HDR displays, while also letting users adjust how vivid SDR and HDR content looks when HDR is enabled.
One thing to remember: on many gaming monitors, enabling HDR can disable or limit some manual image controls, such as brightness, contrast, gamma, colour temperature, and blue light settings. So, if some options become unavailable, it is usually because HDR has taken control of part of the image processing.
Blue Light Filter and Eye Comfort
The blue light filter is useful for late-night gaming, work, or long sessions where eye comfort matters more than colour accuracy. It can make the screen feel warmer and less harsh, especially in darker rooms.
Use it sensibly:
- Lower levels are better for casual use.
- Higher levels can make colours look too warm.
- Avoid it for colour-sensitive games or creative work.
- Turn it off when checking accurate colour or HDR visuals.
Some ASUS display settings can also be adjusted through desktop software on supported models, including saturation, blue light filter, and shadow-related controls. However, some scene modes may require HDR to be turned off first.
For most ASUS displays, the best approach is simple: use SDR for consistent everyday gaming, enable HDR only when it genuinely improves the image, and keep comfort features like blue light reduction for the situations where they help.
Gaming Performance Settings: Refresh Rate, Response Time, and Sync
After the picture looks right, focus on how the monitor feels in motion. The best monitor settings for gaming should make movement look clean, reduce tearing, and keep controls feeling responsive.
Refresh Rate and Frame Rate Matching
A high refresh rate only helps properly when your game is producing enough frames to take advantage of it. For smoother results:
- Use the monitor’s highest stable refresh rate.
- Cap FPS slightly below the refresh rate if you use variable refresh rate.
- Lower in-game settings if frame rate drops too often.
- Prioritise stable FPS over chasing the highest possible number.
This is especially useful for fast shooters, racing games, and competitive titles where smooth motion matters more than extra visual effects.
Response Time and Overdrive Settings
Response time settings (OD/overdrive) control how aggressively the monitor tries to reduce ghosting. The right setting can make movement look cleaner, but pushing it too far can create inverse ghosting, where objects leave bright or unnatural trails.
A simple approach works best:
- Start with the normal or medium overdrive mode.
- Increase it only if motion looks smeary.
- Avoid the highest setting if you see bright trails behind moving objects.
- Test it in a fast game, not just on the desktop.
Some ROG models include variable overdrive, which adjusts the overdrive behaviour as frame rates change. This is useful because one fixed overdrive setting may not look equally good at every frame rate.
G-Sync, FreeSync, and Adaptive-Sync
NVIDIA G-Sync and AMD FreeSync support helps the monitor match its refresh behaviour to the game’s frame output. In simple terms, it can reduce tearing and stutter when frame rate is changing.
For most PC gamers:
- Enable variable refresh rate if your GPU and monitor support it.
- Use it for games where FPS moves up and down often.
- Keep V-Sync settings consistent between the game and GPU control panel.
- Turn it off only if you prefer a fixed competitive setup with very high FPS.
These monitor settings for gaming are especially useful when playing demanding games where the frame rate does not stay locked all the time.
Motion Blur Reduction and ELMB
It can make fast movement look sharper, but it is not always something you should leave on permanently. It can reduce brightness on some displays and may not work with every sync mode on every model.
Use blur reduction when:
- Fast movement looks too smeary.
- You play esports or racing games.
- You are happy with the brightness trade-off.
- Your monitor supports it cleanly with your chosen sync settings.
On supported ROG monitors, ELMB Sync can work alongside G-Sync, FreeSync, or Adaptive-Sync to reduce blur while keeping smoother variable refresh behaviour. Standard ELMB support depends on the model and may not work with every sync mode.
When doing Monitor calibration for gaming, it is better not to turn every performance feature on at once. Start with refresh rate, then sync, then overdrive, then blur reduction. Once the display is set, the next step is to complete your gaming setup with peripherals so you can enjoy gaming like a prop.
ASUS ROG Gaming Features Worth Using
ROG gaming displays include tools that can be useful, but they work best when used with a purpose. The aim is not to turn everything on. It is to choose the ROG monitor settings that suit the game you are playing.
GameVisual Presets and When to Use Them
GameVisual modes are quick picture presets inside the OSD (on-screen display) menu. The exact modes vary by model, but common options include FPS, Racing, Cinema, RTS/RPG, sRGB, MOBA, and User modes. Some newer models include extra modes such as Night Vision.
A practical way to use FPS/racing/cinema modes:
- Use FPS or MOBA modes when visibility matters more than cinematic colour.
- Use Racing or RTS/RPG modes for a balanced everyday gaming look.
- Use Cinema for films or story-heavy games if the image does not look too processed.
- Use sRGB or User mode when you want a more natural picture.
Shadow Boost for Darker Games
Shadow Boost can brighten darker areas without simply raising the whole screen brightness. It is useful in dark maps, horror games, or shooters where enemies can blend into shadowed areas.
Here is how to use Shadow Boost:
- Low levels can improve visibility.
- Higher levels can make blacks look grey.
- Turn it down for cinematic games where dark scenes are part of the atmosphere.
- Test it in-game, not on the desktop.
Shadow Boost is best treated as a visibility tool, not a permanent picture upgrade during ROG monitor configuration.
GamePlus Tools for Practical Use
GamePlus adds small on-screen tools such as crosshair, timer, FPS counter, stopwatch, and display alignment on supported models. These are accessed through the monitor menu, and the available options can vary by model.
Here is how you can apply these tools:
- FPS counter: check if your game is running smoothly.
- Timer or stopwatch: useful for practice runs or timed objectives.
- Display alignment: helpful if using more than one monitor.
- Crosshair: only use it where it is allowed and useful.
Recommended ASUS ROG Settings by Game Type
The best ASUS gaming monitor settings depend on what you play. Competitive games need speed and visibility, while story games usually benefit from richer colour, deeper contrast, and cleaner HDR.
Competitive FPS and Esports Games
For shooters and esports titles, prioritise speed over cinematic visuals.
Use this as a starting point:
- Refresh rate: highest stable option available.
- Picture mode: FPS, MOBA, or User mode.
- Brightness: slightly higher for visibility.
- Contrast: balanced, not too harsh.
- Overdrive: normal or medium to avoid ghosting.
- HDR: usually off unless the game handles it well.
- Shadow Boost: low to medium if dark areas hide too much detail.
These gaming monitor settings help keep enemies, movement, and map detail easier to read without making the image look overly processed.
Racing and Sports Games
Racing and sports games benefit from smooth motion and natural colour. You do not need the most aggressive settings here.
A good setup would be:
- Refresh rate: as high as your system can run smoothly.
- Picture mode: Racing or User mode.
- Brightness: medium to high, depending on the room.
- Contrast: natural, so tracks and pitches do not look washed out.
- Motion blur reduction: useful if fast movement looks smeary.
- Colour: slightly richer, but not oversaturated.
This keeps fast motion clean without sacrificing the overall look of the game.
RPG, Open-World, and Story-Driven Games
For RPGs and cinematic games, focus on atmosphere rather than pure speed.
Try these monitor settings for such games
- Picture mode: Cinema, RTS/RPG, or User mode.
- Brightness: moderate for comfort.
- Contrast: slightly richer if dark and bright areas still show detail.
- Gamma: balanced for depth.
- HDR: on if the game and monitor support it properly.
- Sharpness: moderate, not maxed out.
Good HDR settings can make lighting, skies, reflections, and dark scenes look more impressive, but only when the game handles HDR well. If the image looks grey or washed out, SDR will usually look cleaner.
Console Gaming on PS5 and Xbox
For console use, keep the setup simple and make sure the console is outputting the right signal. PS5 can automatically detect supported display capabilities, but users can still adjust video output settings manually. Xbox Series X supports 4K at 120Hz when the console, display, and HDMI 2.1 connection support it.
Gamers using ASUS monitors for PS5 and PC can follow these settings:
- Resolution: use the console’s supported output, such as 1080p, 1440p, or 4K.
- Refresh rate: enable 120Hz if your monitor and game support it.
- HDR: use it only if the monitor handles it well.
- VRR: enable it if supported by the monitor and console.
- HDMI port: use the correct high-bandwidth port where available.
Getting the resolution settings and refresh rate right first will usually make a bigger difference than changing every colour option in the monitor menu.
Quick Calibration Tips Without Specialist Tools
You do not need professional tools to improve your ASUS monitor calibration. For most gamers, a few careful checks are enough to make the image look cleaner and more consistent.
- Start from a sensible preset: Use User, Racing, sRGB, or another natural-looking preset as your base, then adjust from there. Avoid changing too many settings at once.
- Adjust brightness for the room: Lower brightness in darker rooms and raise it slightly in daylight. This helps comfort without making the image look washed out.
- Fine-tune contrast carefully: Keep contrast balanced so bright areas still show detail and dark scenes do not look crushed.
- Check gamma in real gameplay: Use a game with dark interiors, bright skies, and mid-tone detail. Balanced gamma settings should make shadows visible without making the whole image look flat.
- Keep colour changes small: For casual colour calibration, avoid extreme red, green, and blue adjustments. Small changes usually look more natural than heavy tweaks.
- Save different colour profiles: Use one profile for competitive games, one for story games, and one for general desktop use if your model supports it. ROG monitors commonly allow quick access to display options through the OSD, and some models also support DisplayWidget Center for changing brightness, contrast, and colour temperature from Windows.
- Calibrate HDR separately: If you use HDR on Windows 11, run the HDR Calibration app so HDR content looks more consistent and less washed out.
- Recheck settings after updates: GPU driver updates, Windows display changes, new cables, or a different input can affect your ASUS screen settings. A quick check after major changes can prevent blurry visuals or incorrect refresh behaviour.
Common ASUS ROG Monitor Settings Mistakes to Avoid
A good ROG monitor setup is often about avoiding the wrong settings, not just finding the perfect ones. These are the most common mistakes that can make an otherwise strong display look or feel worse than it should.
- Leaving the refresh rate at 60Hz: Many users forget to change the refresh rate after setup. Check Windows Advanced Display settings and make sure the monitor is running at the highest refresh rate your model, cable, and GPU support.
- Using the wrong resolution or scaling: If the image looks soft, check the native resolution first. Incorrect display scaling can also make text, menus, and game visuals look less sharp.
- Pushing overdrive too high: Aggressive response time settings (OD/overdrive) can reduce blur, but they can also create bright trails or inverse ghosting. Start around the middle setting and only increase it if motion still looks smeary.
- Turning on every gaming feature at once: Sync, blur reduction, Shadow Boost, HDR, and high overdrive can all be useful, but not always together. To get the perfect ASUS gaming monitor settings, change one feature at a time and test it in-game.
- Using HDR when it looks worse: HDR should improve highlights, contrast, and colour depth. If the image looks grey, faded, or too bright, SDR may give a cleaner result for that game.
- Ignoring G-Sync or FreeSync setup: If your monitor and GPU support NVIDIA G-Sync/AMD FreeSync, enable it correctly and check that the game feels smooth without tearing or stutter. G-Sync setup is handled through the display section of the GPU control panel on compatible systems.
- Overusing sharpness and saturation: Too much sharpness can make outlines look harsh, while too much saturation can make colours look unrealistic. Balanced ROG monitor settings usually look better across more games.
- Forgetting to recheck settings after changes: Driver updates, new cables, console changes, or switching inputs can affect refresh rate, HDR, VRR, and colour output. A quick settings check helps keep your ROG monitor setup consistent.
Final Thoughts: Getting the Best Picture from Your ASUS ROG Monitor
The best settings on an ASUS ROG monitor will not be the same for every player. A competitive shooter setup should feel fast, clear, and responsive, while a story-driven game can benefit from richer colour, balanced contrast, and carefully used HDR.
The best approach is to start with a clean base: native resolution, the correct refresh rate, sensible brightness, balanced contrast, and a picture mode that suits the game. From there, adjust your ASUS ROG monitor settings slowly rather than changing everything at once.
Overall, the best ASUS ROG picture settings are about balance. Keep the image sharp without over-processing it, use HDR only when it improves the picture, and save profiles that match how you play. For buyers comparing different ROG models, a ROG Swift vs ROG Strix comparison can also help decide which display type suits your gaming setup better.
Frequently Asked Questions
What is the best GameVisual mode for an ASUS ROG monitor?
There is no single best mode for every game. FPS mode is usually better for visibility in shooters, Racing or User mode works well for everyday gaming, and Cinema mode can suit story-heavy games if the colours do not look too processed. Many ROG monitors include GameVisual presets such as Scenery, Racing, Cinema, RTS/RPG, FPS, sRGB, MOBA, and User mode, though the exact options vary by model.
Should I enable HDR on an ASUS ROG monitor?
Enable HDR only when the monitor, game, cable, and system settings all support it properly. If HDR makes the image look richer, brighter, and more detailed, keep it on. If blacks look grey or colours look washed out, SDR will usually give a cleaner result.
What refresh rate should I use for gaming?
Use the highest stable refresh rate your monitor, cable, and graphics card support. For example, 144Hz is already smooth for most players, while 240Hz or 360Hz makes more sense for competitive games where fast response and motion clarity matter. Windows lets you choose from the refresh rates supported by your display in Advanced Display settings.
How do I reduce input lag on my monitor?
Start by using the correct refresh rate, enabling the right sync setting, keeping FPS stable, and choosing a sensible overdrive mode. Avoid heavy image processing if the game feels sluggish. For competitive gaming, a clean setup with high refresh rate, low input lag, and stable frame pacing is usually better than maxed-out visual settings.
Should I use G-Sync or FreeSync with an ASUS ROG monitor?
Yes, if your monitor and graphics card support it. G-Sync, FreeSync, or Adaptive-Sync can help reduce tearing and stutter when your frame rate changes during gameplay. On supported ROG monitors, ELMB Sync can also work with G-Sync, FreeSync, or Adaptive-Sync to help reduce blur while keeping smoother motion.
Why does my ASUS ROG monitor look blurry?
Blurry visuals are usually caused by the wrong resolution, incorrect scaling, low in-game render resolution, poor cable support, or too much motion blur. Start by checking native resolution, refresh rate, display scaling, and sharpness. Then review in-game settings, especially render scale, anti-aliasing, and motion blur.
You can pay with:
*PayPal Credit Representative Example: Assumed credit limit £1,200, Representative 23.9% APR (variable). Purchase rate 23.9% p.a (variable).Terms & Conditions apply.

PayPal Credit and PayPal Pay in 3 are trading names of PayPal UK Ltd, 5 Fleet Place, London, United Kingdom, EC4M 7RD. Terms and conditions apply. Credit subject to status, UK residents only, Five Tech LTD acts as a broker and offers finance from a restricted range of finance providers. PayPal Pay in 3 is not regulated by the Financial Conduct Authority. Pay in 3 eligibility is subject to status and approval. 18+. UK residents only. Pay in 3 is a form of credit. Check if affordable and how you will repay. May make other borrowing more difficult or expensive. See product terms for more details.
Copyright © 1996-2026 Fivetech LTD | Terms and Conditions
box.co.uk & Box are trading names of Five Tech Limited. Registered office: Box LTD, Unit 10 Woodford Trading Estate, Woodford Green IG8 8HF