
Menu


Get Sales Advice from Mon - Fri 9am - 5:00pm:
020 3337 8950LAST UPDATED: March 13, 2026
How to Upgrade SSD and Install Windows on ROG Xbox Ally
Running out of room for your favourite games or noticing slower loading times? It might be time to upgrade your ROG Xbox Ally SSD. This powerful handheld gaming PC is built for performance, but its default storage can fill up quickly especially with large AAA titles like Cyberpunk 2077 or Starfield.
Upgrading to a faster and larger SSD means more space for your library, quicker boot times and smoother gameplay across the board. The good news? It’s easier than you might think.
In this complete ROG Xbox Ally SSD upgrade guide, we’ll walk you through everything from choosing the right drive to physically installing it and reinstalling Windows. By the end, your Ally will feel brand new and ready to handle anything you throw at it.
Understanding the ROG Xbox Ally SSD Upgrade
The ROG Ally SSD form factor is M.2 2230 NVMe PCIe Gen 4 SSD, which is a smaller, high-speed storage drive designed for compact devices like gaming handhelds and ultrabooks. In simple terms, the ROG Ally SSD slot size supports only the 2230 length format, making it essential to check the exact dimensions before purchasing a replacement drive.
Please note that Rog Xbox Ally and Ally X use different slot sizes. The ROG Ally X uses a larger M.2 2280 NVMe PCIe Gen 4 SSD, which is the standard full-length format commonly found in laptops and desktops. This allows for wider compatibility, easier upgrades, and access to higher-capacity SSD options compared to the original Ally’s 2230 slot.
Why Upgrade?
Modern games are enormous; some take up more than 100GB each. With an upgraded SSD, you can:
- Store more games without worrying about running out of space.
- Load faster thanks to higher read and write speeds.
- Enjoy smoother gameplay with fewer stutters during asset loading.
- Future-proof your Ally, giving it the flexibility to handle new titles for years to come.
Most users choose a 1TB or 2TB upgrade, but the Ally can technically support even larger options, such as 8TB SSDs, depending on your budget and brand choice.
Upgrading doesn’t void your warranty if done correctly, and with the right tools, it’s a safe and straightforward process.
Choosing the Best SSD for Your ROG Xbox Ally
Before starting the upgrade, selecting the right SSD is crucial. The Ally’s internal storage slot supports the M.2 2230 NVMe PCIe Gen 4 interface, so make sure your chosen drive matches this specification.
What to Look For
- Form Factor: Only M.2 2230 SSDs will fit. Larger 2280 models won’t be compatible without adapters.
- Storage Capacity: 1TB or 2TB is ideal for most users, while 4TB+ or 8TB options are great for heavy gamers or streamers.
- Read/Write Speed: Go for at least 5000 MB/s read speed to maximise performance.
- Power Efficiency: Drives with low power consumption will help maintain battery life and keep the system cooler.
Recommended SSDs for Rog Xbox Ally
Here are a few tried-and-tested options available at Box:
Recommended SSD for Rog Xbox Ally
Here are a few tried-and-tested options available at Box:
- Crucial 2TB P310 M.2 2230 PCI Express 4.0 x4 NVMe Solid State Drive (CT2000P310SSD2): Premium performance for users who want the fastest load times.
It offers fast performance, strong durability, and excellent compatibility with the ROG Xbox Ally.
Tools You’ll Need for the Upgrade

Image Source: https://rog.asus.com/no/articles/guides/how-to-upgrade-the-ssd-and-reinstall-windows-on-your-rog-ally/
You don’t need a full workshop to upgrade your Ally, just a few essential tools and a careful approach.
Checklist:
- tools
- A small precision screwdriver set (to remove the back panel screws).
- A plastic prying tool (to open the casing safely without scratches).
- A thermal pad (optional but useful for heat management).
- A USB drive (8GB or larger) to reinstall Windows.
- A backup drive or cloud storage for saving your data.
| Tip: Always back up your files before starting. Make sure the Ally is powered off, unplugged, and fully cooled down before opening it. |
Step-by-Step Guide: How to Upgrade the SSD
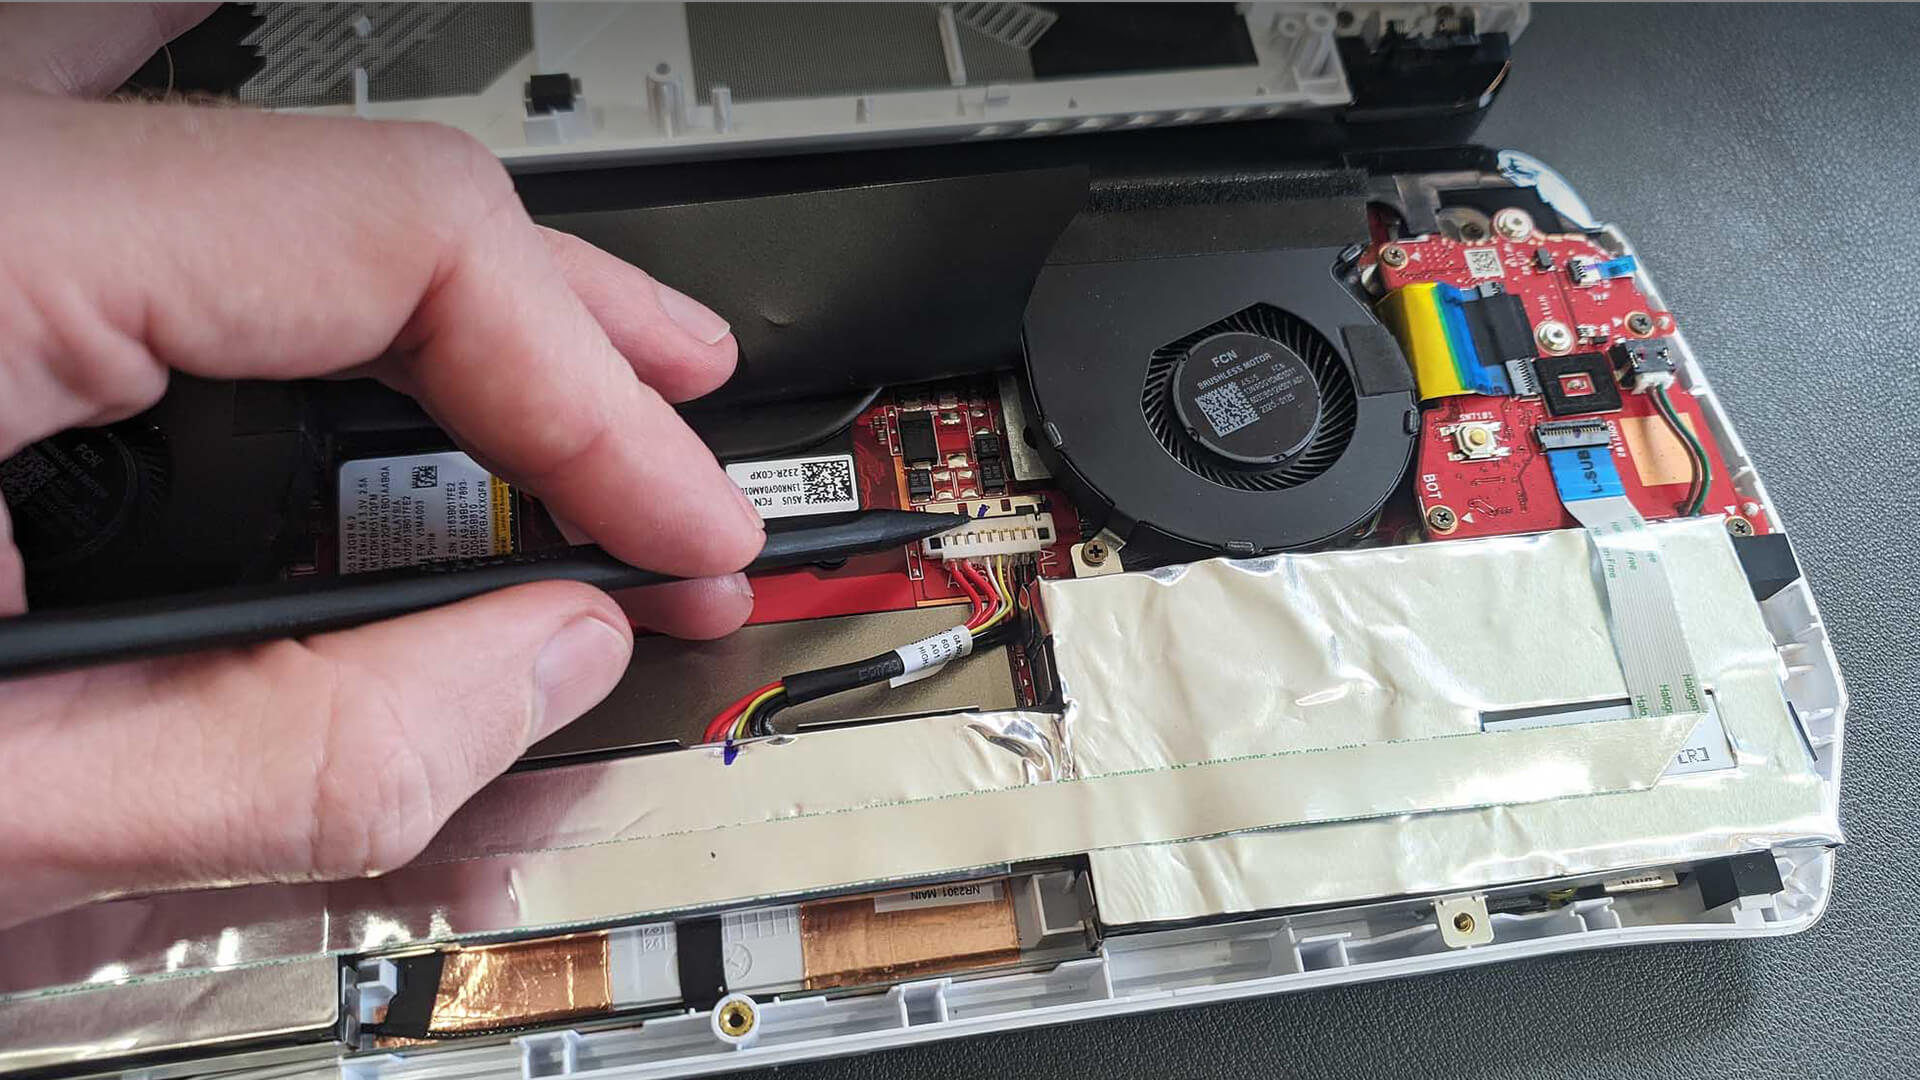
Image Source: https://rog.asus.com/nl/articles/guides/how-to-upgrade-the-ssd-and-reinstall-windows-on-your-rog-ally
This is where the magic happens. Follow these steps carefully to upgrade your ROG Xbox Ally SSD safely.
Step 1: Back Up Your Files
Start by backing up your important data game saves, settings and documents. If you use platforms like Xbox Game Pass, Steam, or Epic Games, your progress will sync online automatically. For local files, copy them to an external SSD or cloud storage.
Step 2: Prepare the New SSD
Unbox your new SSD and double-check the model to ensure it’s an M.2 2230 NVMe PCIe Gen 4 drive. If you’d like, you can pre-format it using another PC, but this isn’t required as Windows will handle formatting during installation.
Step 3: Open the ROG Ally Carefully
Turn the Ally upside down on a soft surface and use your precision screwdriver to remove the screws on the back panel. Use your prying tool gently around the edges to separate the case. Take your time; the clips can be snug. Once opened, you’ll see the battery, fan, and SSD slot near the centre.
Step 4: Remove the Old SSD
Locate the current SSD (a small, flat chip secured by a single screw). Unscrew it carefully and slide it out at a slight angle.
Before touching the new SSD, touch a metal object to discharge any static electricity.
Step 5: Install the New SSD
Insert the new drive at a 30-degree angle into the M.2 slot and press it down gently.
Secure it using the screw you removed earlier. If you have a thermal pad, place it over the drive before reassembling the back panel.
Step 6: Reassemble the Device
Align the back cover and press gently around the edges until it clicks into place. Re-insert and tighten all screws securely.
Step 7: Verify Installation
Press and hold Volume Down + Power to enter the BIOS menu. Under Storage Devices, you should see your new SSD listed.
If it’s detected, you’re ready to install Windows.
Installing Windows on the New SSD

Image Source: https://www.asus.com/media/odin/websites/DK/News/y9hu0kj0qc3uolk0/2025060908.jpg
Once your new SSD is in place, you’ll need to reinstall Windows to get your system running again. This process also ensures maximum performance and compatibility.
Step 1: Create a Bootable USB Drive
On another PC, download Microsoft’s Windows Media Creation Tool and use it to create a bootable USB drive. Choose Windows 11 for the best compatibility with the ROG Ally.
Step 2: Boot from USB
Insert the USB drive into your Ally via a USB-C hub or dock. Hold Volume Down + Power to open the boot menu.
Select the USB drive as the primary boot device.
Step 3: Install Windows
Follow the on-screen prompts to install Windows onto the new SSD.
When asked, select Custom Install and format the SSD. The installation will take around 10–15 minutes depending on the drive’s speed.
Step 4: Reinstall Drivers and Armoury Crate
Once Windows is installed, use Wi-Fi or Ethernet to reconnect to the internet.
Download Armoury Crate SE from ASUS’s support site; this will automatically detect your Ally and install all necessary drivers, including graphics and controller software.
Step 5: Update and Optimise
Run Windows Update and Armoury Crate updates to ensure everything is current.
You can now reinstall your games from Xbox, Steam, or Epic accounts.
After this step, your ROG Ally will boot faster, run smoother, and offer far more room for your growing game library.
Common Mistakes to Avoid
A few small errors can cause frustration, so it’s worth keeping these tips in mind:
- Forgetting to back up data: Once the old SSD is removed, local files are gone. Always back up first.
- Using the wrong SSD type: Only M.2 2230 NVMe PCIe Gen 4 drives fit correctly.
- Applying too much pressure: The casing clips are firm but fragile; be gentle when opening.
- Installing Windows on the wrong drive: Double-check which storage device you’re formatting.
- Skipping driver updates: The Ally relies on up-to-date drivers for stable gaming performance.
With care and patience, upgrading the SSD is a straightforward process that can dramatically improve your device’s performance.
Recommended Accessories for Your ROG Xbox Ally
Now that you’ve upgraded your Ally, you can enhance your setup even further with the right accessories.
- Xbox Controllers: Perfect for docked play or when you prefer a classic console feel.
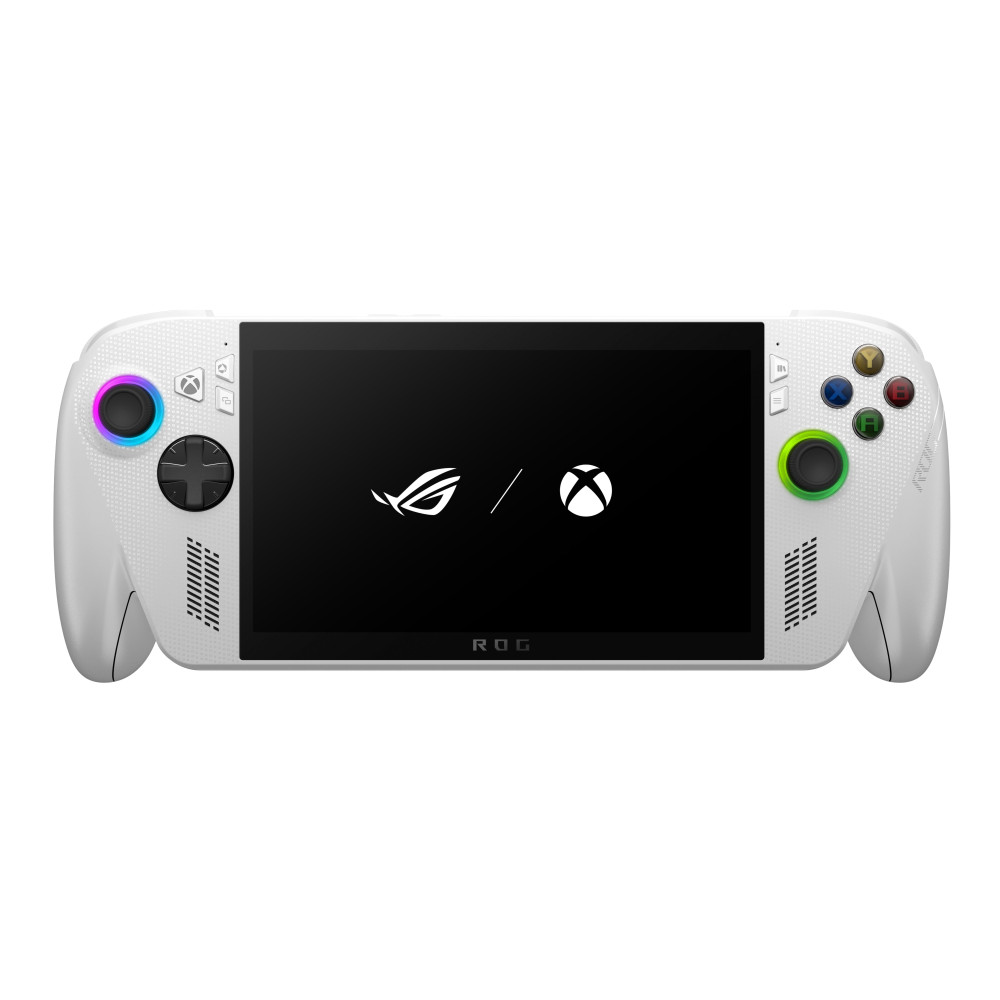
- ASUS ROG Ally: Explore the latest models and accessories designed for seamless handheld gaming.
- Handheld PC Gaming: Browse portable docks, protective cases, and cooling solutions.
- Gaming Consoles: Compare handheld performance with traditional console setups.
- PS5 consoles and Xbox Consoles: For players who love multi-platform gaming.
Product Spotlight:
- ASUS ROG Xbox Ally RC73YA-NH002W – the latest generation of ASUS’s powerful handheld gaming console, designed to push portable performance even further. It features improved thermal management for cooler, quieter operation during demanding AAA sessions, along with enhanced storage support for larger, faster SSDs. Powered by AMD Ryzen Z1 Extreme graphics, it delivers exceptional frame rates, smooth visuals, and quicker load times, whether you’re gaming on the go or docked at home. This upgraded model also supports faster memory and expanded capacity, making it ideal for gamers who want console-grade power in a sleek, portable design.
These accessories help you build a flexible setup that transitions seamlessly between handheld and home gaming.
Final Thoughts: Supercharge Your ROG Xbox Ally
Upgrading your ROG Xbox Ally SSD is one of the simplest ways to unlock more power, performance, and storage. With faster speeds, additional space, and a clean Windows installation, you’ll enjoy an experience that feels brand-new — without buying a new console.
Once you’ve upgraded, your Ally will handle more demanding games, load faster, and give you the flexibility to expand your collection freely.
If you’re ready to take your setup to the next level, explore high-performance SSDs and the latest ROG Xbox Ally range at Box.co.uk — where great gaming gear meets great value.
Frequently Asked Questions
Can you upgrade the internal storage on the ROG Ally X?
Like the original ROG Ally, the ROG Ally X also supports an internal SSD upgrade. However, the ROG Ally X uses a standard M.2 2280 NVMe PCIe slot, which is the same size commonly found in most laptops and desktops. This slot supports larger capacities, up to 4TB or more, depending on the model, making it easier and often more affordable to find compatible drives.
Do I lose my data when I upgrade the SSD on my ROG Ally?
Yes, when you remove the old SSD and install a new one, the internal drive will be blank. You must back up your files first and later reinstall Windows and your games. Some users choose to clone their old drive to the new SSD using an external enclosure before the swap, but the clean install method recommended here ensures the best performance.
How much storage should I choose for a ROG Ally SSD upgrade?
Most users opt for a 1TB or 2TB SSD, which provides enough space for multiple large AAA games without constantly uninstalling titles. If you regularly install large game libraries or use the device for media storage, a 4TB option may be worth considering. Choosing the right capacity depends on your gaming habits and how often you prefer to manage storage manually.
Does upgrading the SSD improve performance on the ROG Ally?
Upgrading to a faster NVMe PCIe Gen 4 SSD can improve boot times, game loading speeds, and overall system responsiveness. While it won’t increase frame rates directly, a higher-performance drive may improve asset streaming and reduce loading-related delays in some games. However, since both the ASUS ROG Ally and ASUS ROG Ally X already ship with PCIe Gen 4 SSDs, real-world gaming performance gains are typically limited to faster load times rather than higher FPS.
Is it difficult to upgrade the SSD on the ROG Ally and Rog Ally X?
Upgrading the SSD on the ROG Ally is relatively straightforward if you follow the correct steps and use the proper tools. The process involves removing the back panel, swapping the M.2 drive, and reinstalling Windows. As long as you take your time, avoid static discharge, and back up your data beforehand, most users can complete the upgrade safely without professional assistance.
You can pay with:
*PayPal Credit Representative Example: Assumed credit limit £1,200, Representative 23.9% APR (variable). Purchase rate 23.9% p.a (variable).Terms & Conditions apply.

PayPal Credit and PayPal Pay in 3 are trading names of PayPal UK Ltd, 5 Fleet Place, London, United Kingdom, EC4M 7RD. Terms and conditions apply. Credit subject to status, UK residents only, Five Tech LTD acts as a broker and offers finance from a restricted range of finance providers. PayPal Pay in 3 is not regulated by the Financial Conduct Authority. Pay in 3 eligibility is subject to status and approval. 18+. UK residents only. Pay in 3 is a form of credit. Check if affordable and how you will repay. May make other borrowing more difficult or expensive. See product terms for more details.
Copyright © 1996-2026 Fivetech LTD | Terms and Conditions
box.co.uk & Box are trading names of Five Tech Limited. Registered office: Box LTD, Unit 10 Woodford Trading Estate, Woodford Green IG8 8HF