
Menu


Get Sales Advice from Mon - Fri 9am - 5:00pm:
020 3337 8950LAST UPDATED: December 08, 2025
How Many Cooler Master Fans Do You Actually Need? Airflow Setup & Fan Placement Guide
Getting the number of case fans right is one of the simplest ways to boost your PC’s temperatures, stability and in-game performance without spending a fortune. Whether you’re building a clean, airflow-optimised rig with Cooler Master fans, or just trying to stop your GPU from throttling mid-raid, fan layout and airflow direction matter more than most first-time builders realise. A well-planned PC case setup keeps heat moving in the right direction, reduces noise, and lets your components breathe properly, especially when you’re pushing high-end hardware.
But how many PC fans do you actually need? Should you go for 120 mm or 140 mm? Is positive pressure better than negative pressure? And what’s the right PC cooling fan setup for office builds, mid-range gaming PCs or full workstation monsters? This guide breaks it all down so you can create reliable airflow from front to back, pick the best CPU case fans, and avoid common mistakes like turbulence and mis-directed airflow.
Why Fan Count Matters for Your PC Build
Getting the right number of case fans isn’t just a finishing touch. It’s a core part of keeping your system cool, consistent and ready for long gaming sessions. Good airflow makes sure heat is moved away from your components instead of letting it build up inside the PC case, which is where performance dips and thermal throttling tend to show up.
Role of Airflow in Component Cooling
Airflow is the backbone of every cooling setup. Your PC cooling fan configuration drives fresh air into the chassis while pushing hot air out, creating a steady cycle that your CPU cooler and GPU fans can work with. When this airflow is balanced, you’ll see more stable frame rates, lower temperatures, and reduced noise from ramping fans. The right number of case fans helps you maintain this balance whether you’re running a basic setup or a high-performance gaming tower. You can see gaming PC builds with airflow in our collection at Box.
How Fans Help Maintain Performance and Longevity
Stable cooling directly affects part lifespan. A cooler GPU avoids clock drops, a cooler CPU can sustain boost speeds, and even your storage drives benefit from reliable airflow. Using high-quality options like Cooler Master fans also helps ensure consistent static pressure and reduced vibration. As long as you have the right number of case fans, your system will stay cooler without relying on harsh RPM spikes.
Common Mistakes in Fan Quantity and Placement
Many new builders either add too few fans or go overboard. Too few limits airflow and traps heat, while too many can create turbulence that works against itself. Placement mistakes also interrupt the front-to-back airflow that most PC fans are designed around.
Too Many Fans Causing Turbulence or Noise, Mis-Directed Airflow
Stacking fans wherever they fit can lead to noisy airflow patterns, dead zones, or even reversed pressure that pulls in dust. It’s better to plan a simple path: cool air enters from the front or bottom, flows past your GPU and CPU cooler, then exits out the top and rear. Keeping the number of case fans in line with this pattern makes airflow predictable and efficient.
Factors That Determine How Many Fans You Need
There’s no single perfect number of case fans for every build. Instead, the ideal setup depends on your case size, your components, how much heat they produce, and what kind of airflow pattern works best for your system. Getting these factors right keeps temperatures low and makes your build far quieter, especially when pairing quality Cooler Master fans with a well-designed PC case.
1. Case Size and Layout (Mini-ITX, Mid-Tower, Full-Tower)
Different chassis sizes support different cooling configurations. Smaller cases like Mini-ITX may only have room for two PC fans, while larger mid-towers and full-towers offer multiple intake and exhaust positions, giving you more control over airflow.
Fan Count Ranges by Size:
- Mini-ITX: Typically 1–2 fans, often one intake and one exhaust.
- Mid-Tower: Usually 3–5 fans depending on front, top and rear mounting points.
- Full-Tower: 5–8+ fans, ideal for high airflow setups and heavy GPU/CPU loads.
The bigger your case, the easier it becomes to match the optimal number of case fans for positive pressure and smooth airflow.
2. Component Heat Output (CPU, GPU, Power Draw)
High-powered CPUs and GPUs generate a significant amount of heat, especially when gaming or rendering. A GPU with a high TDP or a CPU running boost clocks for long periods will need extra help from good airflow. This is where pairing the right cooling gear with proper PC fans setup ensures you maintain stable performance and stop components from choking hot air.
If you’re running top-tier GPUs or unlocked CPUs, consider upgrading both your cooler and the number of case fans working together in the airflow loop.
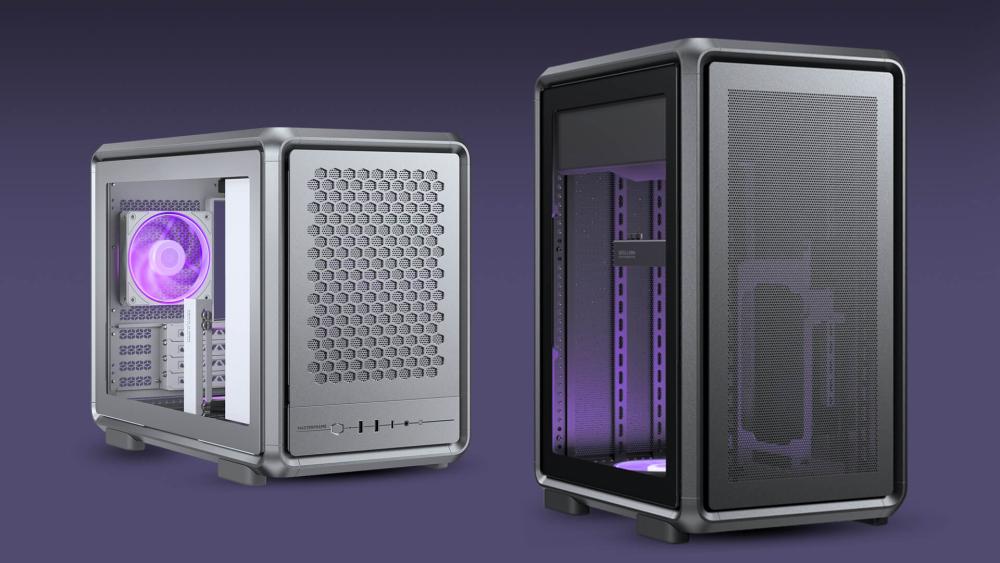
3. Front-to-Back Airflow Path & Panel Design (Mesh vs Glass)
The design of your front panel has a direct effect on cooling potential. Mesh-front cases allow more air to enter with less resistance, while solid or glass panels can restrict intake.
Impact of panel design on airflow:
- Mesh Panels: Best airflow, ideal for high-TDP components.
- Glass/Solid Panels: Reduced intake; you may need more static pressure fans or an increased number of case fans to compensate.
The airflow path should always encourage cool air coming in through the front or bottom, then exiting at the rear or top for a clean cooling loop.
4. Desired air-pressure setup (positive, neutral, negative)
Air pressure refers to the balance between intake and exhaust fans in your PC case. It influences heat removal, dust levels and noise.
Benefits & trade-offs of each
- Positive pressure (more intake): Helps reduce dust build-up and is ideal for quiet builds.
- Neutral pressure (balanced fans): Usually the safest configuration for most gaming setups.
- Negative pressure (more exhaust): Strong hot-air removal but can pull dust through unfiltered gaps.
Choosing the right pressure setup depends on your case and the number of case fans you can install effectively.
5. Cooling Hardware & Radiator Placement (AIOs and Air Coolers)
Your choice of CPU cooling hardware also affects the ideal number of case fans. AIO liquid coolers, air coolers and radiators all change how air moves through your system. If your radiator takes up front-intake space, for example, you may need additional top or bottom PC fans to maintain balanced airflow.
How radiators affect airflow and fan count
- Front-mounted AIO radiators: Can restrict intake airflow and may require extra top exhaust fans to keep heat moving properly.
- Top-mounted radiators: Usually improve airflow but reduce the number of top exhaust positions available for standard PC cooling fans.
- Large dual-tower air coolers: Push warm air directly toward rear exhaust fans, making the rear fan essential for the correct number of case fans.
If your cooler uses radiator fans that double as intake or exhaust, remember to include them in your overall airflow plan, so your PC case maintains proper pressure and temperature control.
Recommended Fan Counts & Placement for Different Builds

The ideal number of case fans changes depending on what you’re using the PC for. A light office build won’t need the same airflow as a gaming tower running a powerful GPU, and high-end workstations demand even more cooling headroom. Below are practical setups you can follow for different build types, using reliable Cooler Master fans to keep your temps stable and your rig running smoothly.
Office / Everyday Use Build
Basic web browsing, media consumption, and productivity workloads don’t generate much heat. You only need a simple intake-and-exhaust setup to keep air moving through the PC case.
1–2 fans (intake + exhaust)
A single front intake paired with one rear exhaust is usually enough. This gives you a neutral or slightly positive airflow pattern without needing to push the number of case fans any higher than necessary. It also helps keep the system quiet, ideal for home offices or study builds.
Gaming / Mid-Range Performance Build
Once you introduce a dedicated GPU, heat output rises quickly. For gaming or mid-range systems, a more balanced PC fans setup boosts cooling efficiency and prevents thermal throttling.
3–5 fans (e.g., 2 intakes front, 1 exhaust back, optional 1–2 top fans)
This is the sweet spot for most players. Two strong front intakes feed cool air directly to the GPU, while a rear fan removes heat. Top fans act as optional exhausts, especially useful if you have a mesh top panel. This layout ensures your number of case fans provides strong airflow from front to back without creating turbulence.
High-End / Overclock / Workstation Build
High-TDP GPUs, overclocked CPUs and rendering workloads demand aggressive airflow. More mounts in larger cases make it easier to scale cooling properly.
4–6+ fans, with optional bottom or side intake
For these builds, spreading out your PC cooling fan placement gives much better temperature consistency. Bottom intake helps feed GPUs fresh air, while side-panel intakes (if your case supports them) push air directly onto the hottest zones. This type of rig is common in full-towers or enthusiast cases where the higher number of case fans boosts both performance and stability.
Placing Fans in Your Case: Intake Front/Bottom, Exhaust Top/Rear
No matter the build type, the airflow path should remain predictable: cold air enters through the front or bottom and exits at the top or rear. This keeps your system efficient and prevents pockets of hot air from forming.
- Front intake: Primary source of cool air directed at GPU and CPU area.
- Bottom intake: Optional but great for GPU-heavy builds.
- Rear exhaust: Removes CPU and cooler heat efficiently.
- Top exhaust: Utilises rising warm air for easy heat removal.
Maintaining this airflow loop ensures the number of case fans you install actually works together in a controlled cooling cycle, rather than fighting each other.
Matching Cooler Master Fan Series to Your Setup
Choosing the right Cooler Master fans makes a huge difference in performance, noise levels, and the number of case fans you actually need. Some fans are better for strong front-intake airflow, others are optimised for exhaust roles or pushing through restrictive mesh and radiators. Picking the right series saves money, improves cooling, and helps you create a clean pressure balance inside your PC case.
Best Series for Intake Roles vs Exhaust Roles
Cooler Master offers several fan lines that focus on different performance traits. For intake, you generally want higher airflow and solid static pressure for pulling cool air past dust filters. For exhaust, you want smooth, consistent airflow that pairs well with the rest of your PC fans setup.
Popular roles:
- Intake: SickleFlow, MasterFan Halo, and other high-airflow designs pull cool air into the chassis efficiently.
- Exhaust: MasterFan Pro or high static-pressure models work well pushing warm air out the rear or top.
Matching the right fan type to each mounting point means you can maintain a stable cooling loop with the ideal number of case fans, rather than simply adding more fans to brute-force better airflow.
Fan Size Considerations (120 mm vs 140 mm):
Fan size directly influences cooling performance and noise. Larger 140 mm fans move more air at lower RPMs, so they often allow you to reduce the total number of case fans required for the same airflow. Meanwhile, 120 mm fans offer more flexibility and fit more cases, especially compact or budget-friendly builds.
- 120 mm fans: Higher RPM and stronger static pressure, great for intakes behind tight mesh or radiators.
- 140 mm fans: Quieter, more airflow per fan, and perfect for builds where noise reduction matters.
Choosing the right size also affects your overall cooling budget. In many cases, replacing three 120 mm fans with two quality 140 mm Cooler Master fans can maintain airflow while reducing noise and cost, as long as your PC case supports the mounts.
You can check out our fan series comparison guide for more information on choosing the right fan series for your build.
Budget-Friendly Tips
Before you lock in your build, use this quick checklist to make sure you’ve chosen the right number of case fans, optimised airflow, and can successfully avoid overspending. These steps help you confirm everything lines up properly inside the PC case, so you get cool and quiet performance without wasting money.
Check Your Case’s Fan Mounts and Compatibility
- Confirm how many fan mounts your case actually supports (front, top, rear, bottom, side).
- Check which sizes fit: 120 mm, 140 mm or a mix.
- Make sure radiator mounts aren’t blocking standard fan positions.
This prevents you buying fans your case can’t use and stops you exceeding the ideal number of case fans your layout can support.
Balance Noise, Airflow and Cost - More Isn’t Always Better
- Aim for a clean front-to-back airflow path instead of stacking extra fans.
- Pick intake fans with good static pressure if you’ve got mesh or dust filters.
- Avoid unnecessary RPM spikes — fewer high-quality fans often cool better than many budget ones.
Most mid-range systems don’t need the maximum number of case fans your chassis can hold. A balanced setup is nearly always quieter and cheaper.
When to Upgrade to More Fans vs When to Improve Cooling Quality
Use this rule of thumb:
- Upgrade to more fans if your intake-to-exhaust ratio is unbalanced or your GPU temps are climbing due to low airflow volume.
- Upgrade to better fans if you already have enough airflow but still hear excessive noise or see inefficient pressure.
- Upgrade the cooling loop (CPU cooler, airflow path, thermal paste) if component temps spike despite having a sensible number of case fans.
For cost-efficiency, improving quality often outperforms increasing quantity.
Conclusion
Getting the right number of case fans makes more difference to your PC’s performance than most people expect. With a proper front-to-back airflow path, the right mix of intake and exhaust, and fans chosen to suit your case layout, you can keep temps low, noise under control and stability rock-solid during long gaming sessions. Whether you’re building a compact system or a full workstation tower, Cooler Master fans give you plenty of flexibility to match airflow to your components without wasting money on unnecessary extras.
If you're upgrading or starting fresh, you can browse Cooler Master fans at Box.co.uk, check compatible PC Power Supplies, and grab quality thermal paste to support your cooler. You can find thermal paste for your build along with other accessories at Box. Once you dial in the correct number of case fans for your build, you’ll have a clean, efficient setup that stays cool no matter what you’re playing.
FAQs
Are 3 fans enough for a gaming PC?
Yes, for most mid-range builds, three fans are a solid starting point. Two front intakes and one rear exhaust create a balanced airflow loop, and this number of case fans is usually enough for GPUs under heavy gaming loads.
Can I use three intake fans and no exhaust?
It’s possible, but not ideal. Without an exhaust, warm air has fewer places to escape, which can lead to heat build-up. You’ll still want at least one rear or top exhaust to support the correct number of case fans and maintain pressure balance.
Do I need 3-pin or 4-pin fans?
4-pin PWM fans offer better speed control, quieter idle operation and improved airflow tuning. They’re ideal for gaming builds. If cost is tight, 3-pin DC fans still work, but they may not manage temperatures as consistently when you increase your number of case fans.
Are two 140 mm fans better than three 120 mm fans?
Often yes. Two quality 140 mm Cooler Master fans can match the airflow of three 120 mm fans while running quieter. If your case supports them, this can reduce the total number of case fans you need.
Is a 3000 RPM fan too high?
For case fans, usually yes. 3000 RPM fans are extremely loud and generally designed for industrial or radiator-heavy setups. Most standard airflow builds don’t need such extreme speeds, especially if you already have the optimal number of case fans installed.
You can pay with:
*PayPal Credit Representative Example: Assumed credit limit £1,200, Representative 23.9% APR (variable). Purchase rate 23.9% p.a (variable).Terms & Conditions apply.

PayPal Credit and PayPal Pay in 3 are trading names of PayPal UK Ltd, 5 Fleet Place, London, United Kingdom, EC4M 7RD. Terms and conditions apply. Credit subject to status, UK residents only, Five Tech LTD acts as a broker and offers finance from a restricted range of finance providers. PayPal Pay in 3 is not regulated by the Financial Conduct Authority. Pay in 3 eligibility is subject to status and approval. 18+. UK residents only. Pay in 3 is a form of credit. Check if affordable and how you will repay. May make other borrowing more difficult or expensive. See product terms for more details.
Copyright © 1996-2026 Fivetech LTD | Terms and Conditions
box.co.uk & Box are trading names of Five Tech Limited. Registered office: Box LTD, Unit 10 Woodford Trading Estate, Woodford Green IG8 8HF