
Menu


Get Sales Advice from Mon - Fri 9am - 5:00pm:
020 3337 8950LAST UPDATED: July 07, 2025
How to Build Your Home NAS Setup with WD Red Drives
Given the importance of data and security, the need for a reliable and efficient storage solution has never been greater. A NAS machine is just another computer optimised for use as a shared storage device. It serves as your personal, always-available cloud storage—but without the monthly fees, privacy concerns, or reliance on an internet connection. It's a single, centralised place where all your devices can seamlessly store, access, and share files. And if you set it up right, your NAS server can do so much more, from automated backups to media streaming and even remote access when you're away from home.
Like any other computer, a NAS appliance contains one or more CPUs and memory chips. The CPU speed and the amount of memory within the device determine the overall performance. Enterprise-grade NAS appliances, for example, come packed with Intel Xeon processors, whereas consumer-grade NAS systems integrate an Intel Atom processor or something similar. However, unlike traditional external hard drives, NAS systems operate independently, allowing multiple users to store, retrieve, and share files without hassles.
But here's the thing: the backbone of any NAS setup is the hard drive. Not just any drive, but one built to handle 24/7 operation, constant read/write cycles, and the unique demands of a multi-user environment. This is the reason Western Digital external hard drives are a favourite among NAS buyers. WD Red drives, particularly, are designed for low power consumption and long-term performance, making them a smart investment for your home setup.
In this guide, we'll walk you through everything you need to know to build your home NAS system with Western Digital Red hard drives. From choosing the right NAS storage device to configuring RAID and optimising the potential for media streaming and backups, we've got you covered.
So, let's jump right in!
The Benefits of a NAS Storage System
Picture this: your laptop is running out of space; your external hard drives are scattered around and finding that one important file feels like searching for a needle in a haystack. Sound familiar? From family photos to work documents, your collection of movies and music to chunks of offline games, digital clutter is a real struggle. And let's be honest, relying on random USB sticks and cloud subscriptions that keep increasing in price isn't exactly a sustainable solution.
Here are the key benefits of NAS drive storage systems:
1. Centralised Storage for All Your Devices
With a NAS storage at your disposal, you can get rid of juggling multiple USB drives, external hard drives, and cloud storage subscriptions. Instead, all your important files—documents, photos, videos, and backups—are stored in one location that every device on your network can access. This makes sharing files between family members or colleagues effortless.
2. Remote Access Anytime, Anywhere
One of the key features of a NAS system is the ability to access your data remotely. Whether you're working from a café, on vacation, or simply on a different floor of your home, you can log into your NAS and retrieve files just as easily as if sitting in front of your PC. Most modern NAS systems have mobile apps and web portals, making remote access secure and user-friendly.
3. Enhanced Data Security and Protection
Unlike traditional hard drives, NAS stoarge devices offer built-in redundancy through RAID (Redundant Array of Independent Disks) configurations. RAID can protect your data from hard drive failures by mirroring your files across multiple drives, ensuring that even if one drive fails, your data remains safe. Many NAS systems also support automated backups to cloud services, providing an additional layer of protection.
4. Energy-Efficient and Always On
Contrary to desktop computers or external storage solutions that require manual operation, NAS devices are designed to run 24/7 while consuming minimal power. They feature advanced power management settings that help keep electricity usage low, making them an excellent long-term investment for home and business users.
5. Scalable Storage That Grows with You
If you've ever had to upgrade your PC's hard drive due to storage limitations, you'll appreciate the flexibility of a NAS storage system. Many NAS devices allow you to add more drives as your storage needs increase. Some even support expansion units, which means you can expand your storage capacity without replacing the entire system.
Building Your Home NAS Storage Setup: Step-by-Step Guide
Now that you understand the benefits of having a NAS system, it's time to get hands-on and set it up. The guide below will take you through each step, ensuring you get the most out of your NAS storage solution.
Step 1: Choose Your NAS System
For home users, the primary concern isn't managing a large number of users but rather handling multiple simultaneous device connections. If you're simply using the NAS for overnight laptop backups, the setup is relatively simple. However, if you're streaming high-resolution videos to multiple devices—such as two tablets, a laptop, and a smart TV—all at once, you'll need a NAS with enhanced memory, processing power, and network performance. A more robust NAS is also necessary to store extensive media libraries, such as a collection of 100,000 stock photos for a graphic design studio.
Popular NAS Systems to Consider
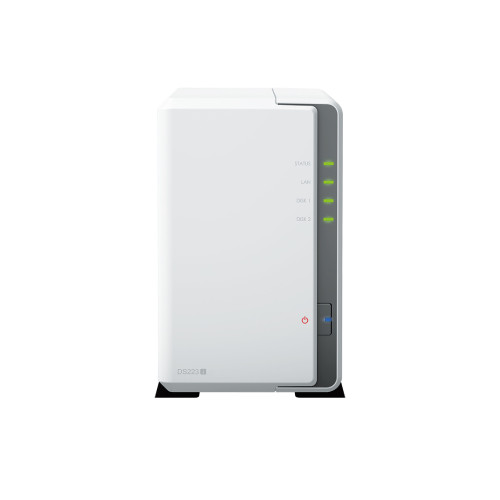
- Synology DiskStation DS223j: It is a budget-friendly, two-bay NAS ideal for home users needing basic file storage and backups. It features a Realtek RTD1619B processor and supports essential NAS functions like media streaming and remote access.
- QNAP TS-873A-8G: For advanced users requiring higher performance, we recommend a QNAP TS-873A-8G, a more robust eight-bay NAS. Powered by an AMD Ryzen V1500B processor, it is perfect for multimedia storage, virtualisation, and business-level applications.

Since your NAS device is, at the simplest level, a storage enclosure for one or more hard drives. The most critical specification for any NAS unit is its maximum storage capacity, which is primarily determined by the number of drive bays it offers. The type of drives the NAS supports can also influence its overall storage potential. A two-bay NAS is sufficient for personal use, but a four- or eight-bay NAS is a better investment if you plan to store large amounts of data or use RAID configurations for redundancy. Don't overlook features like built-in backup solutions, cloud integration, and hardware encryption for security.
Step 2: Choose the Best WD Red Drives
Your NAS is only as reliable as the hard drives inside it. NAS makers often recommend specific hard drive models or series that have been tested for compatibility with their systems. Before purchasing a drive, it's important to keep an eye on compatibility lists. If you already own hard drives that you plan to use, check for validation on these lists. However, if your drives aren't listed, it doesn't necessarily mean they won't function. However, when buying new drives, following the NAS manufacturer's recommendations is the safest choice.
Certain hard drives from Seagate, Toshiba, and WD are specifically designed for NAS applications. These "NAS-certified" drives are typically built for continuous operation, 24/7/365, which exceeds the durability of standard consumer-grade hard drives. Among the NAS-specific hard drives, the WD Red hard disks stands out as the powerhouse that handles 24/7 workloads, reducing wear and ensuring long-term durability.
Top 2 Recommended WD Red Drives for NAS Storage
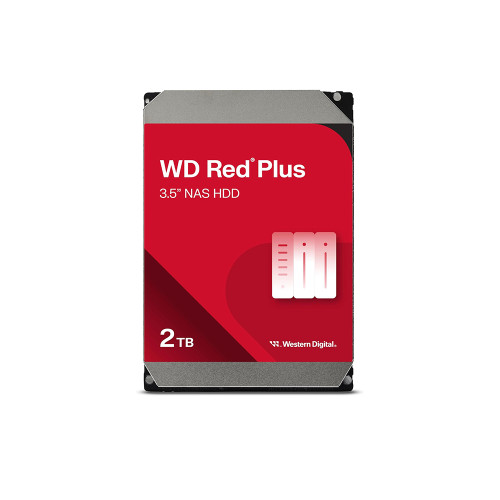
- WD Red Plus 2TB (5400 RPM, 3.5"): A great entry-level NAS drive for small storage setups or single-drive NAS systems.
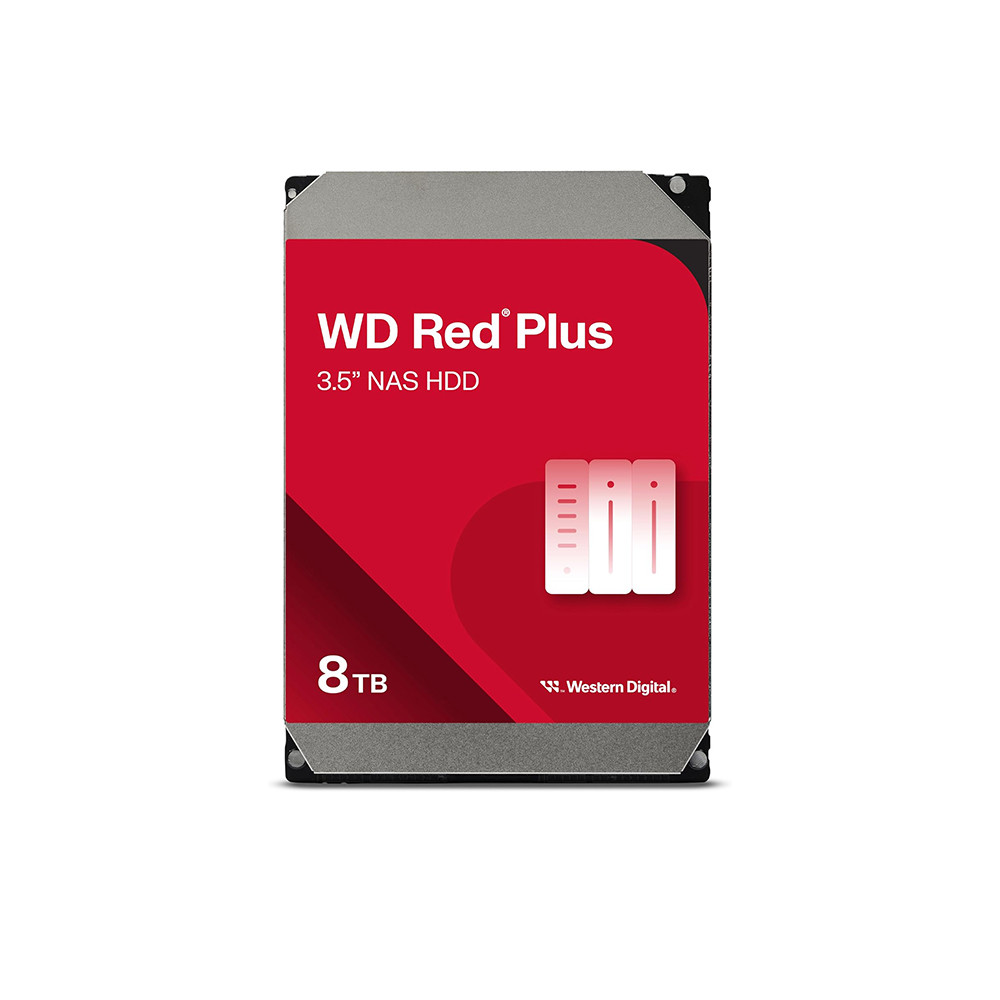
- WD Red Plus 8TB (5640 RPM, 3.5"): A high-capacity option for more extensive storage needs, RAID setups, or media-heavy applications.
Western Digital hard disks come in different categories, including WD Red, WD Red Plus, and WD Red Pro. WD Red Pro is the best choice if you need higher speeds and enhanced durability for intensive workloads. These hard drives are rated for NAS systems with more than eight bays and have higher RPM speeds for faster data access.
Step 3: Install and Configure Your NAS
Once you've selected your NAS and drives, it's time to put everything together and get your system up and running.
-
Install Your WD Red Drives
- Open your NAS enclosure by unscrewing or sliding off the bay cover.
- Insert the WD Red drives into the available slots. Some NAS models require you to screw them into place, while others use tool-less drive trays.
- Secure the drives and reassemble the NAS enclosure.
- Connect and Initialise Your NAS Storage
- For stable performance, plug your NAS into a power outlet and connect it directly to your router or network switch using an Ethernet cable.
- Turn on your NAS and allow it to boot up. Some models include LED indicators to show the device's and drives' status.
- Use a computer or mobile device to log into and access the NAS setup interface. This is typically done by entering the NAS's local IP address in a web browser. Many NAS brands offer dedicated setup applications for easy configuration.
Step 4: Configure NAS Settings
Each vendor has its own NAS setup method, but the basic steps are the same for setting up a rackmount NAS appliance.
- Set Up User Accounts
Leaving the default username and password active poses a huge security threat. At a minimum, changing the default password is essential. Ideally, setting up individual accounts for every administrative staff member is recommended. Certain appliances offer integrated support for Active Directory authentication.
You have to log in to the appliance to configure administrative accounts. Each manufacturer has a unique method for accessing its administrative interface—some allow access via a web browser, whereas others supply a specific client application for their users.
- Choose a RAID Configuration
RAID helps improve performance and redundancy in case of drive failure. Common configurations include:
- RAID 0 (Striping): Faster performance but no data redundancy.
- RAID 1 (Mirroring): Data is duplicated across two drives for redundancy.
- RAID 5 (Striping with Parity): Balanced performance and fault tolerance (requires at least three drives).
- RAID 6 (Double Parity): Better redundancy with fault tolerance for two drive failures.
- RAID 10 (Combination of Striping & Mirroring): High performance and redundancy but requires at least four drives.
- Enable File Sharing and Network Access
This can mean a few different things, depending on the purpose of the NAS setup. To use it as a file server, you must establish share-level permissions. Depending on the system's file system, you might also need to establish some file-level permissions. Moreover, you should assign an IP address to the appliance unless you plan to use dynamically assigned IP addresses and create the corresponding DNS host record. Typically, you also need to enable an appropriate access protocol.
- Install Applications
Depending on your use case, install NAS apps for:
- Backup Solutions (Time Machine, rsync, or third-party cloud backup services)
- Media Streaming (Plex, Kodi, or DLNA servers)
- Security Features (Firewall settings, automatic updates, and two-factor authentication)
Step 6: Test and Optimise Your NAS Performance
At a minimum, you should perform a diagnostic check to verify that the NAS has detected all its hard disks correctly. Many brands include a built-in diagnostic function that users can run to assess the system's overall health. The NAS's built-in diagnostics tools can check drive health and monitor temperatures. It is also recommended that file transfer tests be run to ensure your NAS is performing optimally. If speeds are slow, consider upgrading to a Gigabit Ethernet or even 10GbE network. Additionally, check VPN or DDNS (Dynamic DNS) settings for secure access to your NAS while away from home.
Step 7: Configure Notifications
The rackmount appliance should now be accessible, but additional steps are needed to complete the NAS setup, including configuring notifications. NAS storage systems typically feature a built-in alerting system that notifies administrators of potential issues. For instance, this system can send alerts about fan failures, low disk space, or malfunctions.
To enable notifications, the appliance must be configured to communicate with your mail server, and an email address or distribution list must be specified for receiving alerts. Alternatively, the NAS setup should support integration with a centralised monitoring and alerting system for managing notifications.
Step 8: Configure the backup
Although not technically a NAS configuration step, the final step should be setting up a backup job to safeguard the NAS system. With built-in scheduling features and support for multiple backup protocols, WD Red drives make it easy to set up an automated home backup with NAS, eliminating the risk of forgotten manual backups. In most cases, backup agents cannot be installed directly on a NAS appliance, so backups are typically performed using the Network Data Management Protocol (NDMP). NDMP is designed to facilitate data transfers between backup servers and NAS appliances.
Step 9: Expand and Maintain Your NAS Over Time
A NAS is a long-term investment that grows with your needs. The following are some best practices for maintaining and expanding your NAS system:
- Regularly Update Firmware: Keep your NAS operating system and drive firmware up to date for security and performance improvements.
- Monitor Drive Health: Use SMART monitoring tools to detect drive issues before they fail.
- Add More Storage as Needed: Expand your NAS by adding more drives or upgrading to higher-capacity WD Red drives.
- Consider SSD Caching: Some NAS models allow SSD caching to improve performance when working with frequently accessed files.
- Ensure Proper Cooling and Ventilation: NAS devices generate heat, especially when running 24/7. Make sure your NAS is placed in a well-ventilated area to prevent overheating, which can lead to drive failures.
- Audit User Access and Security Settings: Review user permissions, network access logs, and security settings to prevent unauthorised access. Enable two-factor authentication (2FA) and firewall protection for added security.
Conclusion
Setting up a home NAS setup with WD Red drives is one of the best decisions you can make for secure, scalable, and efficient storage. With a NAS, you get more than just extra space—you get a centralised, always-on hub for your data and ultimate accessibility without the limitations of traditional external hard drives or costly cloud subscriptions.
By now, you've seen how a NAS system isn't just a simple storage solution. It can be your personal cloud, a media streaming powerhouse, a backup fortress, and a file-sharing hub—all in one compact setup. Whether you're a home user looking for reliable backups, a small business wanting a setup for secure file sharing, or a content creator managing vast amounts of data, a properly configured NAS will serve you well for a long time.
Of course, like any other piece of technology, your NAS requires regular maintenance and upgrades to keep it running for years to come. It's better to keep an eye on drive health, update firmware, and ensure proper security measures to maximise its potential and longevity.
If you’re focused on protecting your personal data, the WD Red-powered setup could easily become the best NAS for home backup, offering reliable, always-on protection for your files. The best part? Once your NAS is up and running, It works quietly in the background, simplifying your digital life without constant intervention. No more scattered external hard drives lost USB sticks, or expensive cloud storage plans—just a seamless, centralised, and reliable storage solution in one place.
So, no matter what you set up your NAS system for, WD Red drives provide the best value for your money. Ready to take control of your storage? Explore the best NAS systems and WD Red drives at Box.co.uk and start building your perfect setup today.
Disclaimer: Products mentioned in this article may have been included for promotional purposes. However, all recommendations are made based on their quality, real-world performance, and suitability for NAS setups.
Before setting up your NAS, why not tidy up your digital space first? Our guide to the best portable, internal, and external storage options is the perfect place to start your digital declutter journey. Read our guide: Best Storage Tech for a Digital Declutter
You can pay with:
*PayPal Credit Representative Example: Assumed credit limit £1,200, Representative 23.9% APR (variable). Purchase rate 23.9% p.a (variable).Terms & Conditions apply.

PayPal Credit and PayPal Pay in 3 are trading names of PayPal UK Ltd, 5 Fleet Place, London, United Kingdom, EC4M 7RD. Terms and conditions apply. Credit subject to status, UK residents only, Five Tech LTD acts as a broker and offers finance from a restricted range of finance providers. PayPal Pay in 3 is not regulated by the Financial Conduct Authority. Pay in 3 eligibility is subject to status and approval. 18+. UK residents only. Pay in 3 is a form of credit. Check if affordable and how you will repay. May make other borrowing more difficult or expensive. See product terms for more details.
Copyright © 1996-2026 Fivetech LTD | Terms and Conditions
box.co.uk & Box are trading names of Five Tech Limited. Registered office: Box LTD, Unit 10 Woodford Trading Estate, Woodford Green IG8 8HF